
Have you ever printed artwork with smoke, glowing effects or soft shadows, only to find that the result looks different from the screen? One reason can be how the printer handles transparency and white ink.
Halftoning can help by turning selected shades or transparent areas into printable dots. It is also used for vintage graphics and photographic effects. The important part is knowing when to use it and how to adjust the artwork for DTF or DTG.
What is halftone printing?
Halftoning uses dots of different sizes or spacing to create the appearance of shades and gradients. Instead of printing one continuous area, selected parts of the design are broken into dots with spaces where the garment can show through.
There are two common uses:
- Creative halftone effects. Useful for vintage graphics, photographs, illustrations and distressed designs.
- Transparency and fade conversion. Useful for smoke, glows, shadows and soft edges.
These uses are different. If only the edges of your artwork fade, applying a halftone to the entire design may reduce detail unnecessarily.
DTF halftone printing
DTF printing transfers artwork from printed film onto the garment using adhesive powder, heat and pressure. Halftoning can convert transparent effects into defined dots, but very small or isolated dots may not transfer consistently.
The result also depends on the printer, ink, adhesive powder, curing, heat press settings and garment. Start with clearly defined dots and test before bulk production.
DTG halftone printing
DTG printing applies ink directly onto the fabric. Dark garments normally need a white ink underbase beneath the coloured artwork.
Partially transparent edges can sometimes produce white outlines or unusual fades. Converting selected fading areas into halftone dots may give better control. DTG can also reproduce some gradients without halftoning, so not every design needs it.
Suggested starting settings for DTF and DTG
There is no single setting that works for every printer or design. Use this table as a starting point when experimenting with AAPS: Asia Apparel Print Studio.
| Setting | DTF | DTG |
|---|---|---|
| Halftone mode | Fade conversion | Fade conversion |
| Dot size | 0.50 mm | 0.40 mm |
| Dot spacing | 0.80 mm | 0.65 mm |
| Threshold | 10% | 8% |
| Density | 100% | 100% |
| Export resolution | 300 DPI | 300 DPI |
They are not guaranteed production settings or manufacturer recommendations. Threshold and density depend on the AAPS processing method. Check the preview, then confirm the artwork with an actual print test.
Afterglow example: what the halftone is doing
The Afterglow sample in AAPS contains a solid planet, fine lettering and wide transparent glows. This makes it useful for seeing the difference between fade conversion and a Full Image artistic halftone.
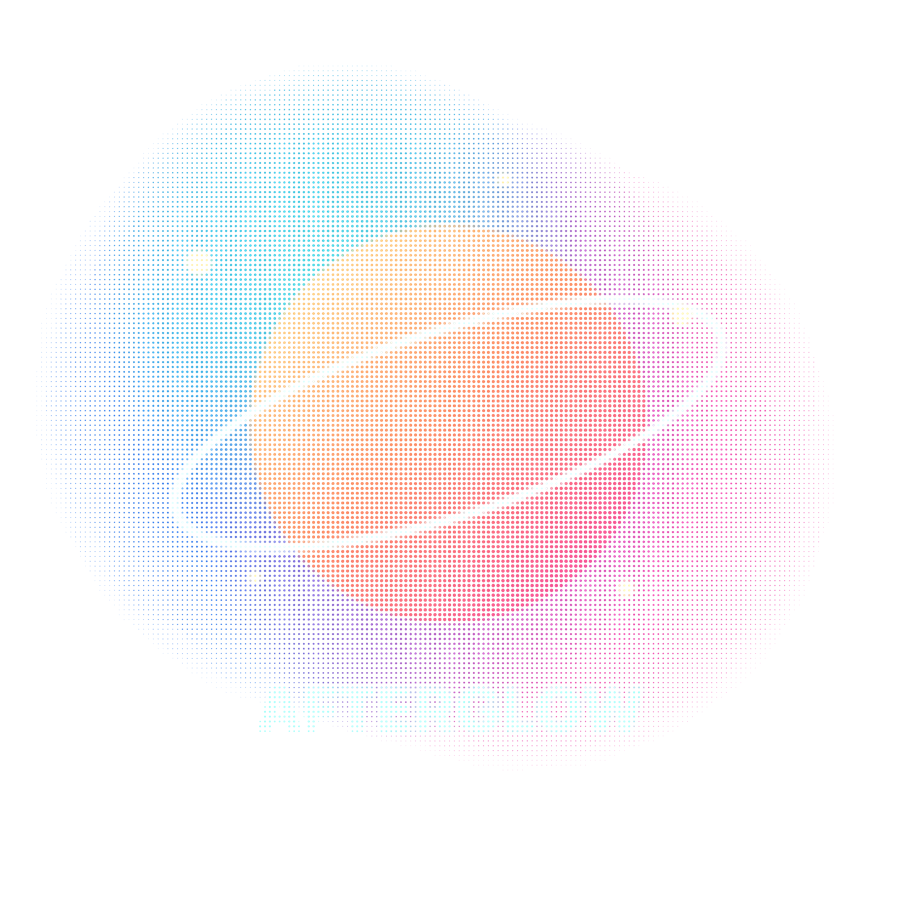
Soft glows contain many partially transparent pixels. AAPS can convert those fades into solid dots with transparent gaps.
DTF Recommended and DTG Recommended use the same processing engine with different experimental dot settings. They do not simulate a printer.
Fine, Balanced and Bold / Retro are artistic strengths for a dotted effect across the complete image. They are separate from the DTF and DTG starting settings.
What should you check? Keep the lettering readable, inspect isolated dots at 100% or 200%, and view the transparent PNG against light and dark colours. A screen preview cannot confirm how the smallest dots will transfer or print.
What each setting changes
Dot size
Dot size controls the maximum diameter of the halftone dots. Larger dots create a more obvious pattern and may be easier to reproduce. Smaller dots retain finer detail but can become difficult to print consistently. If dots disappear after printing, increase the dot size before changing several controls at once.
Dot spacing
Dot spacing is the distance between dot centres. Closer spacing creates denser coverage. Wider spacing leaves more garment colour visible. If the dots are too large for the spacing, they can merge and lose the halftone appearance.
Threshold
Threshold controls how much faint artwork is retained. Increasing it removes more low-opacity information. This can clean up unwanted haze, but it may also remove subtle shadows and glows. Adjust it gradually while comparing the original and processed artwork.
Density
Density changes how much of the halftone area is filled. More density creates stronger coverage. Less density creates a lighter, more open pattern. Higher density is not automatically a better print.
Full-image halftone or fade conversion?
Choose full-image halftone when you want a visible dotted or vintage effect across the entire design.
Choose fade conversion when you want to preserve the main design while turning selected transparent areas into dots. For text, logos and detailed artwork, fade conversion often protects readability better.
Removing black or white backgrounds
A solid rectangular background is often unwanted for T-shirt printing. AAPS can remove black or white backgrounds, but these controls can also remove intentional details of the same colour. Preview the result against both light and dark T-shirts before downloading.
Is 300 DPI enough for T-shirt printing?
300 PPI at the intended print size is a useful target for many raster artwork files. It cannot repair a low-resolution original.
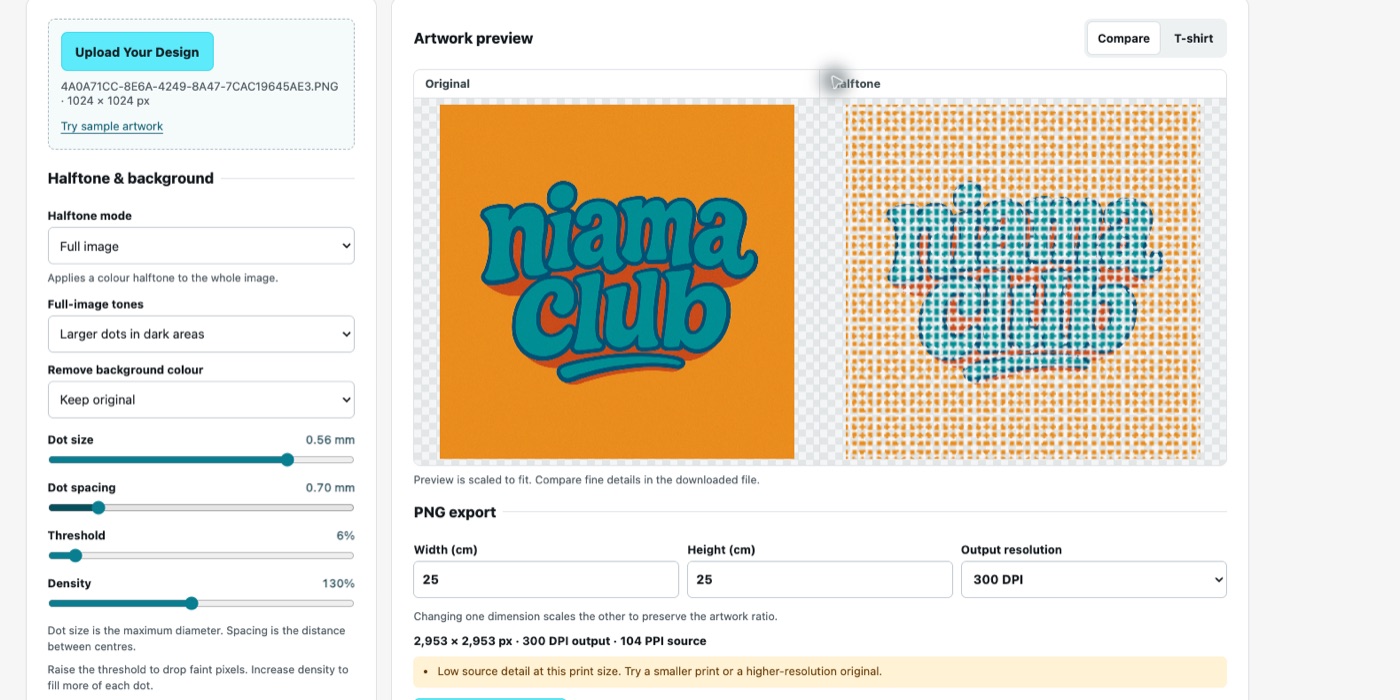
For example, a 1,024-pixel-wide image printed at 25 cm wide has an effective source resolution of about 104 PPI. Exporting a larger 300 DPI PNG changes the output pixel dimensions, but it cannot restore missing detail. Start with the best artwork available and remember that image PPI and printer hardware DPI are different measurements.
How to use AAPS
- Upload your artwork. Choose a PNG, JPG or WebP image.
- Choose the halftone mode. Use fade conversion for transparency effects or full-image halftone for a dotted graphic style.
- Adjust one setting at a time. Work through dot size, spacing, threshold and density.
- Preview the result. Compare the original and processed image, then test light and dark T-shirt colours.
- Download the PNG. Set the print dimensions and check any effective-resolution warning before export.
Try AAPS: Asia Apparel Print Studio
Upload your artwork, adjust the halftone and download a transparent PNG. No signup required.
Try Our Free DTF & DTG Halftone Generator →Does halftoning make a print softer?
Sometimes. Halftoning can reduce printed coverage and leave more fabric exposed. The final feel also depends on ink coverage, fabric, adhesive, pretreatment and production settings. A halftone does not automatically guarantee a softer print.
Frequently asked questions
Do all DTF designs need halftoning?
No. Many logos, illustrations and full-colour graphics can be printed without a halftone effect.
Can the same artwork be used for DTF and DTG?
Often yes, but the final appearance can differ because the printing method and white-ink settings affect the result.
Why are some halftone dots missing after printing?
They may be too small or too isolated for the printing setup. Artwork processing and production settings can also affect the result.
Why does my artwork have a white outline?
Unwanted pixels or white-underbase handling may be the cause. Check the transparency and printer settings.
Can I use AAPS for free?
Yes. AAPS is a free browser-based image tool and does not require compulsory registration.
Does a 300 DPI export guarantee good printing?
No. Original image quality and physical print size still matter.